|
Students use packing peanuts to create patterns, but using paint and stamping. Students Cut out stamped peanuts and arrange them in a new pattern.
|
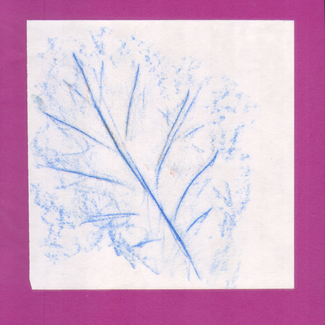
Students used old crayons without the paper on them to create these leaf rubbings. Simply go pick up some leaves off the ground, and then place the leaf under your piece of paper, and rub a crayon over the paper.
|
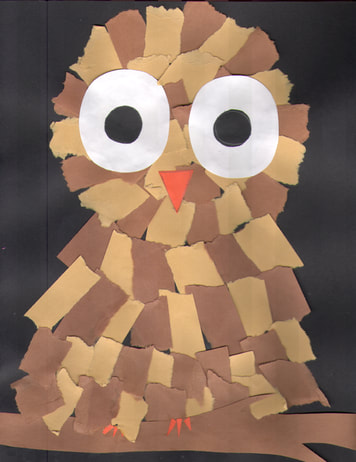
We traced a circle to make a guide for the head of the owl, then created a body. Using two shades of brown, we tore small squares to create "feathers" for our owl. We finished it off by adding some big eyes, a little branch, a beak, and some claws.
|
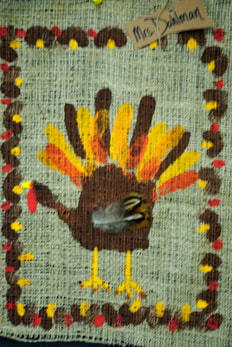
Students used tempera paint to create their hand print turkeys on a piece of burlap. The students first pressed their hands into a tray of brown paint and made a hand print onto the burlap. Second the students painted their index finger with a yellow and added more "feathers" to the turkey. We repeated this process a couple of times with a yellow-orange and an orange color paint. Students painted a beak and legs. Using their fingers they created a boarder to frame their turkey. We added a couple real feathers for a little extra pizazz!
|
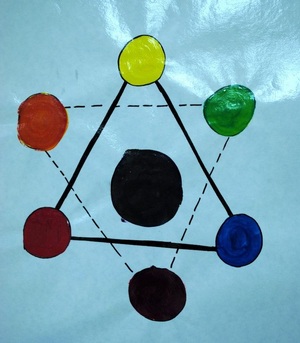
The students loved learning about the Additive Color Wheel (mixing of pigments such as paint and ink) and color mixing. Students were given yellow, blue, and red paint. Using these Primary colors and a paintbrush they painted inside the circles. We then mixed the primary colors to create Secondary Colors; green, orange, and violet. In the additive color wheel, all of the primary colors mixed together to create black or gray. The Subtractive Color Wheel (mixing of light) has primaries of red, blue and green. When these are mixed they create white...for example white lite.
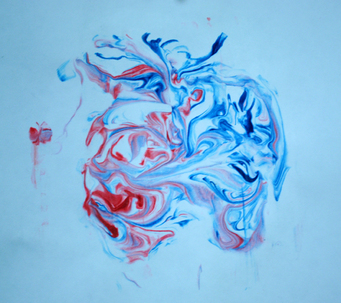
Make sure you use thicker paper for this project. First, spray a little bit of shaving cream (the cheaper the better) onto a piece of thick paper. Smooth the shaving cream so it covers the paper. Add a couple drops of food coloring to the top of the shaving cream. Use a toothpick or craft stick to stir the shaving cream to make a cool design. Scrape the shaving cream off of the paper (Use something flat...a Popsicle stick, craft stick or ruler will work well).
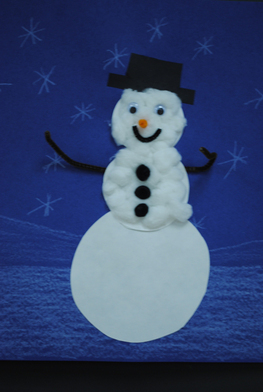
Students used a roll of masking tape to trace three circles. We "built" our snowman by gluing the circles on top of each other. We covered the snowman with cotton, then decorated him with googly eyes, puff balls and pipe cleaners. We added some land lines and snowflakes in the background.
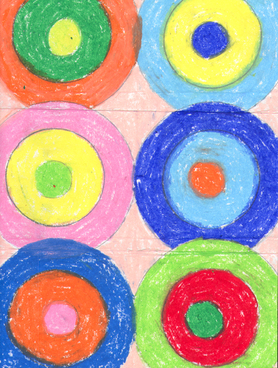
Students learned about Wassily Kandinsky and his artwork. Students traced rolls of tape and other object to create their circles. The circles were then colored with different colored oil pastels. We talked about the importance of balancing color, making sure there is not too much of one color in one area.
|
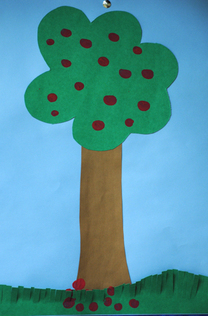
Using construction paper, students cut out a large tree trunk and green tree top. We talked about Jonny Appleseed, parts of the tree, how trees and apples grow. Students learned to cut fringed on paper to create a grass texture. We painted apples with our fingers using red tempera paint.
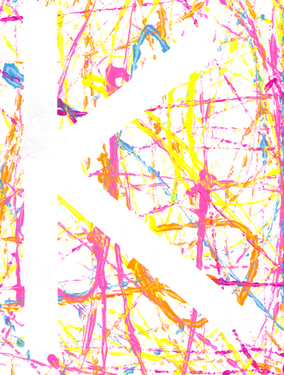
Students used Masking tape to make their first initial. We then placed our paper in a tray. We put a few marbles into paint dishes, then one color at a time, rolled the paint-covered marbles over our paper. When the paint dried, we peeled the tape off, revealing our initials!
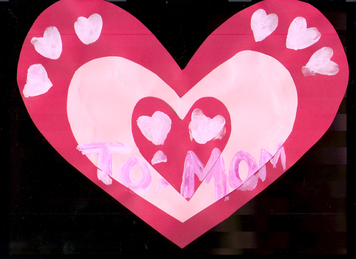
Students cut out pre drawn hearts and glued them together to make design or pattern. We mixed red and white paint to make pink. Students painted hearts with their fingers, and wrote messages to their valentine

This project is super simple. Simply glue together three Popsicle/craft sticks to make a triangle. Paint them green on front and back. Add decoration, we used glitter and glue. Add a paper trunk and string to hand the ornament.
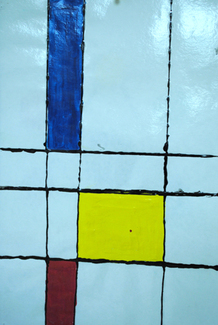
Students used a ruler to create some vertical and horizontal lines with their pencils. Then they used colored glue (just mix a little paint into a glue bottle) to trace over their lines. Students painted a few boxes with primary colors red, yellow, and blue.
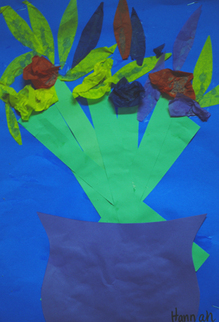
The students used green strips of paper and arranged them to form a bouquet of flower stems. Watercolor paints and brushes were used to make circle centers for the flowers. They then used tissue paper pieces to make pedals. We finished it off by adding a vase form cut from construction paper.
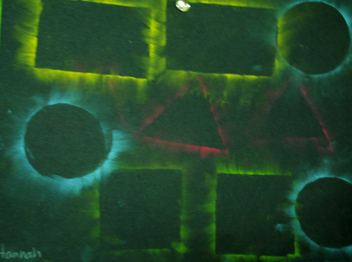
Students cut out simple geometric shapes, then colored the edges of the shapes with soft chalk pastels. They then placed the shapes on black construction paper. Using their fingers they smudged the soft pastel onto the black paper, creating this cool shape composition.
|
